WordPress Set Up Basics for Bicycle Stores
With WordPress the set up is slightly more complicated than SquareSpace but remember you are investing the time now for more flexibility later.
With WordPress the set up is slightly more complicated than SquareSpace but remember you are investing the time now for more flexibility later.
If you've decided to use SquareSpace only (and completed the set up in the previous tutorial) you can skip ahead to SEO Friendly Website Structuring for Bicycle Stores
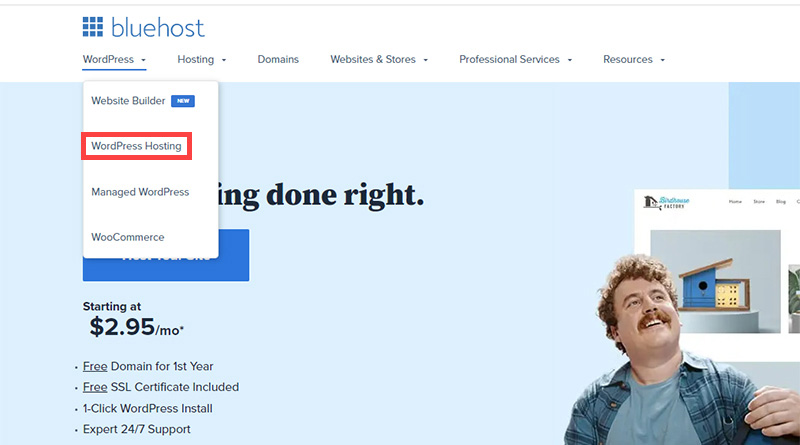
- Open a new browser window and navigate to https://www.bluehost.com
- From the top menu select 'WordPress' -> 'WordPress Hosting'.
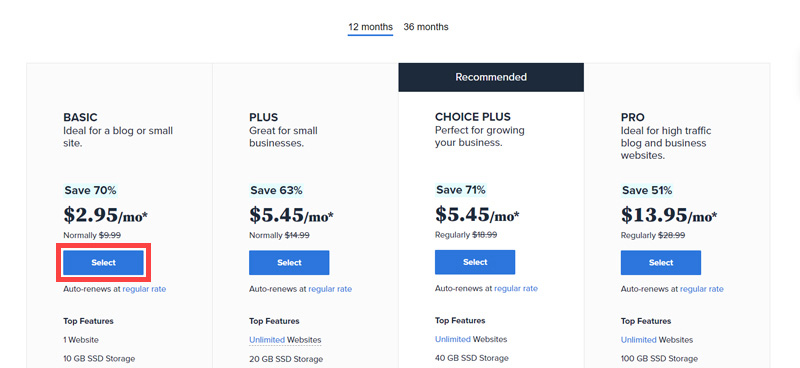
- Scroll down until the pricing table is visible. Select their 'Basic' plan. You can always upgrade later if you need to.
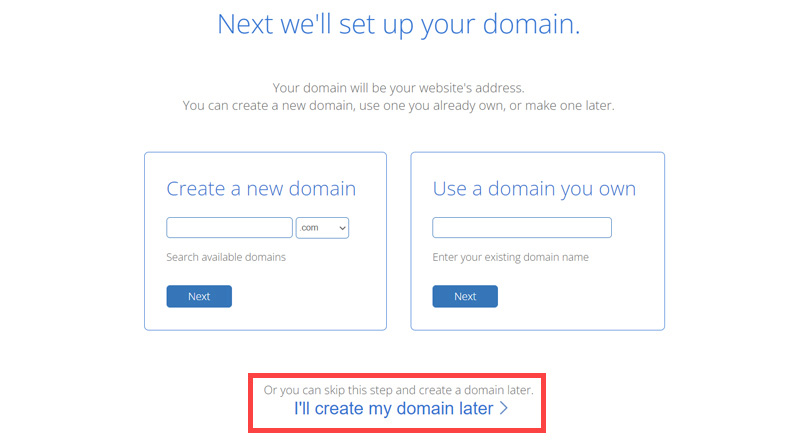
- We're just experimenting with WordPress at the moment so click "I'll create my domain later"
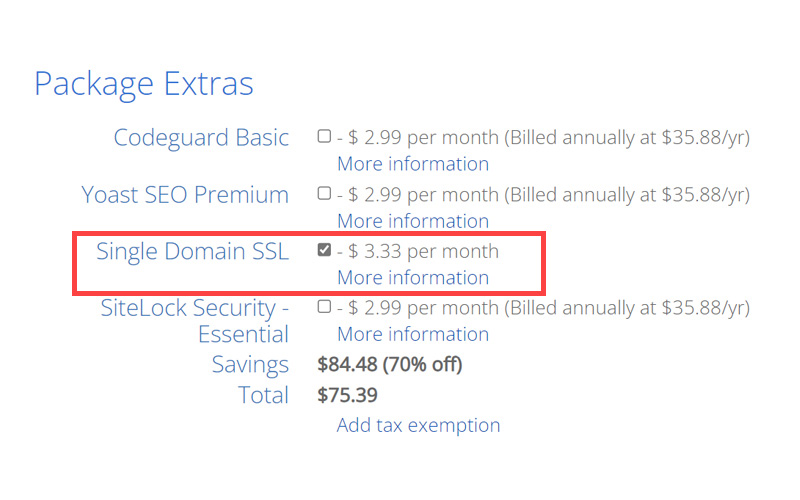
- On the next screen fill out your account details. In the 'Package Extras' area untick all the boxes although consider the 'Single Domain SSL' option if you are already sure you want to have your website on WordPress.
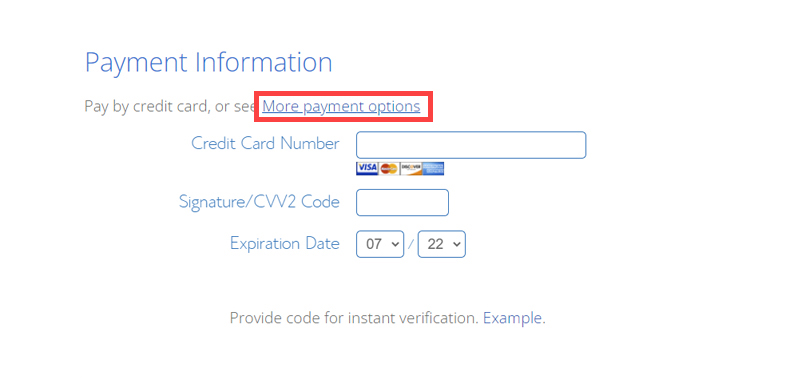
- Click on 'more payment options' and select PayPal to pay with the PayPal (you can use a credit card on PayPal and you do not need a PayPal account).
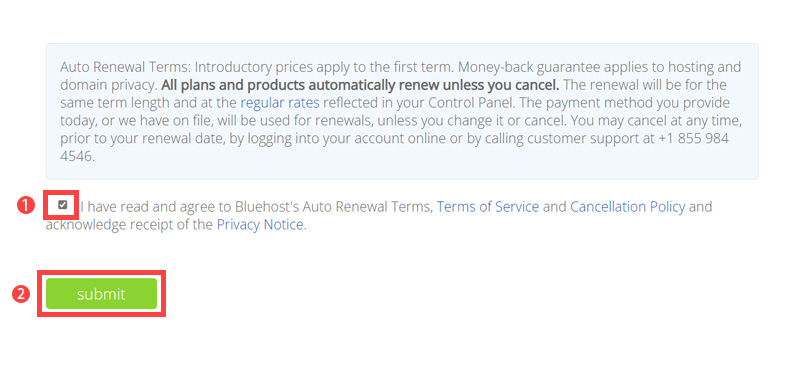
- After filling out your account details, tick the terms and service box and click on the 'submit' button.
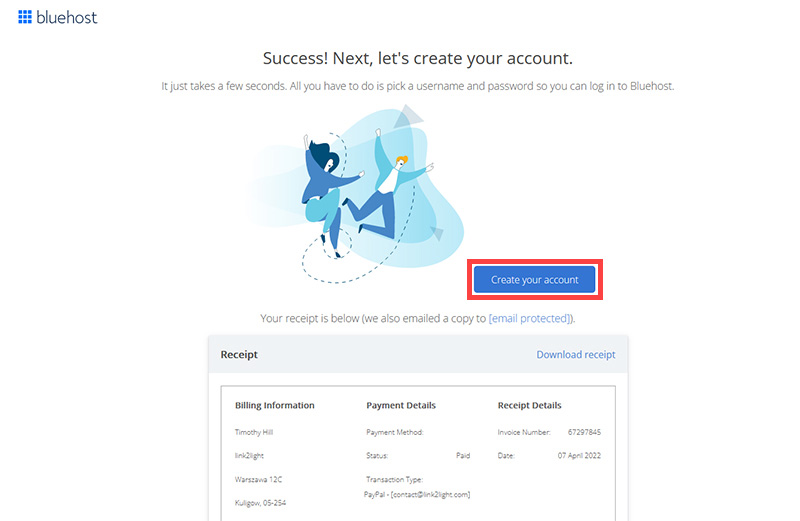
- After you have gone through the PayPal checkout you will be redirected to a page like the one below. Click 'Create your account'
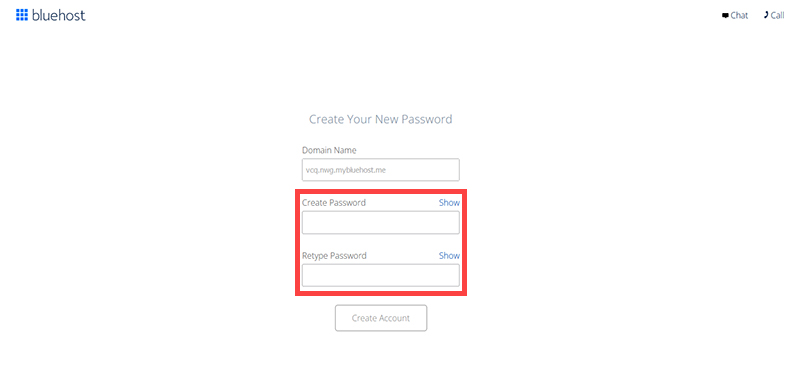
- Think up a secure password ad enter it here. Then click 'Create Account'.
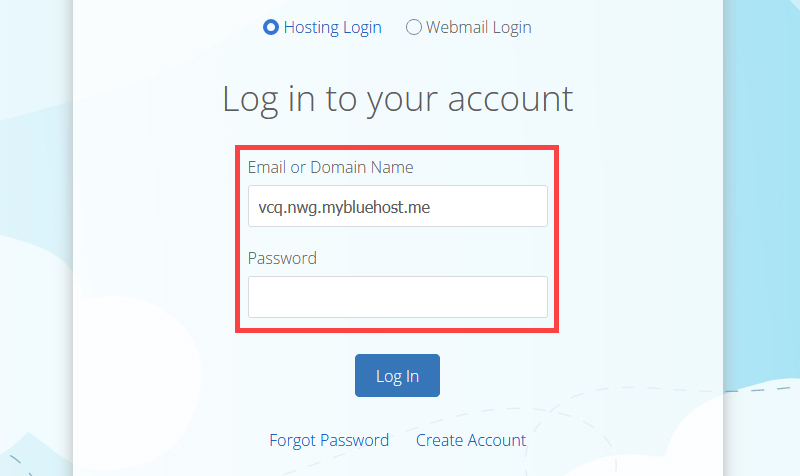
- You will be redirected to a page like the one below. Click 'go to login'.
- Use the password you have just thought up to log in.
- Now click on 'Create your website'
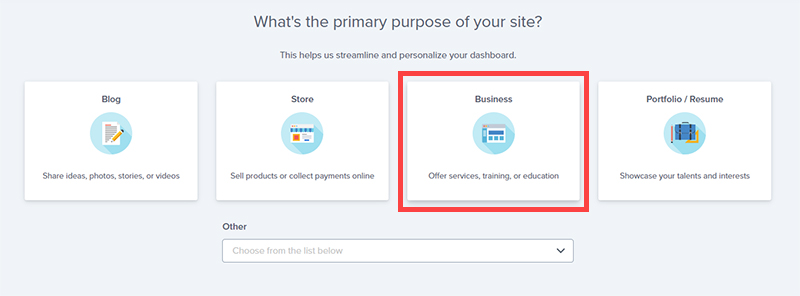
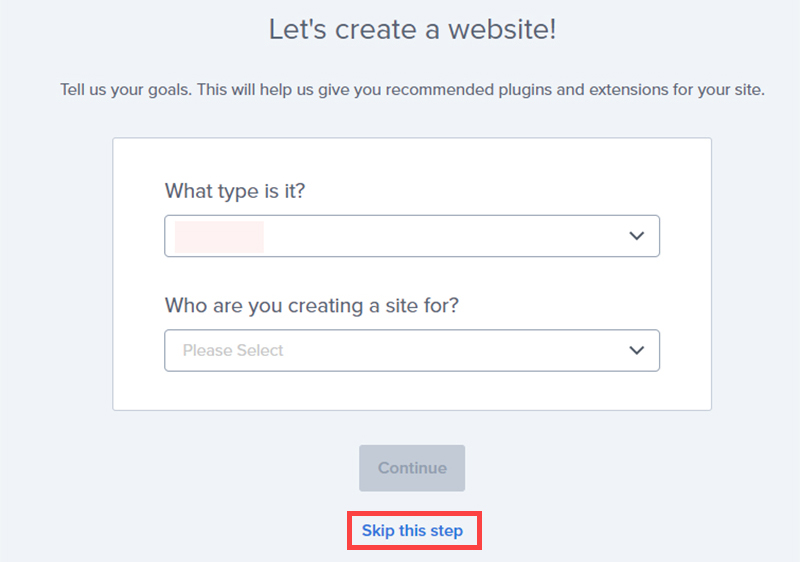
- Select business
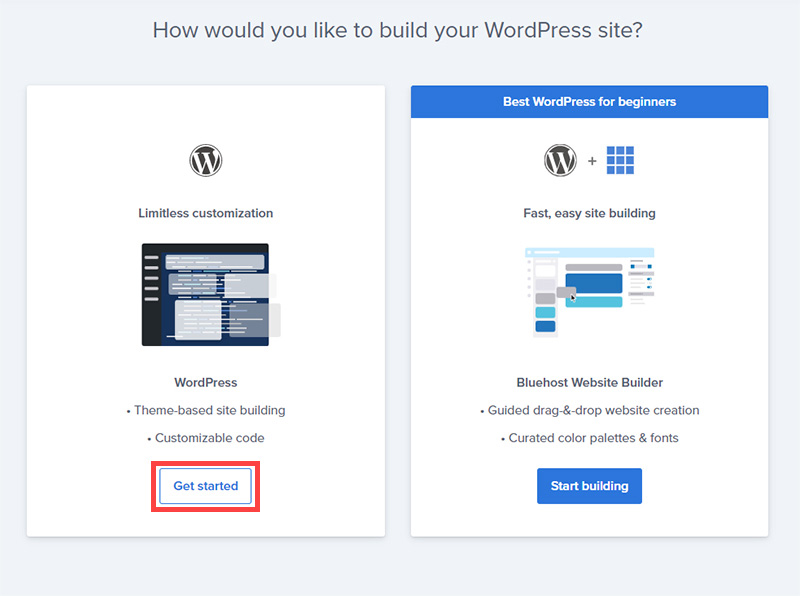
- Click 'Get started'. We'll ignore the BlueHost Website Builder offered in this step because there are better options out there.
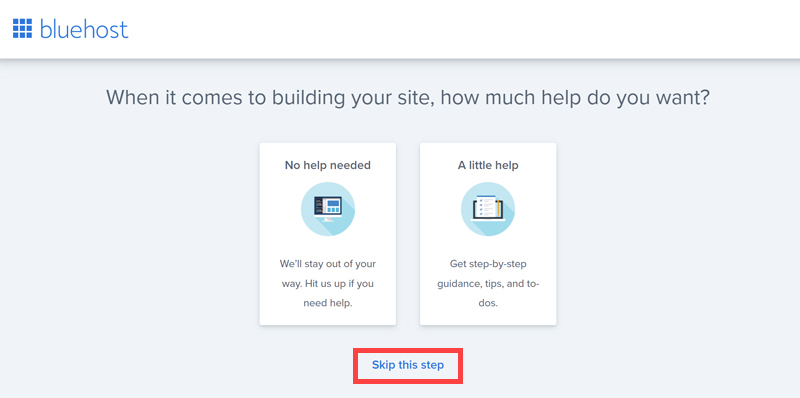
- Skip this step.
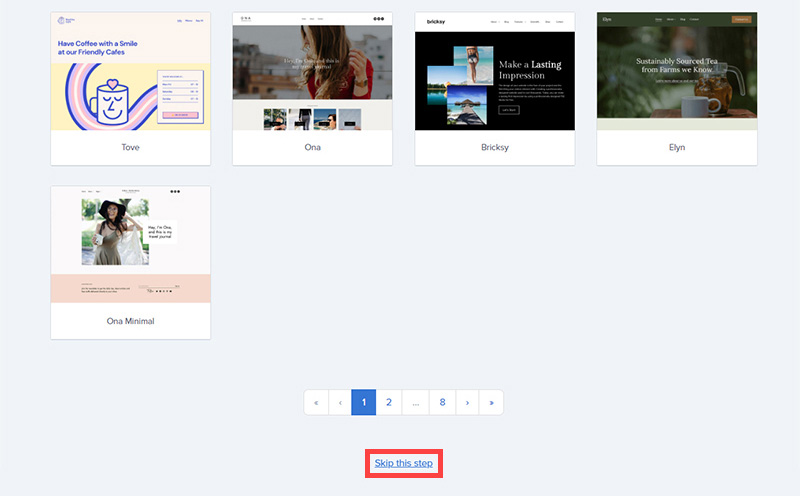
- Skip this step as well.
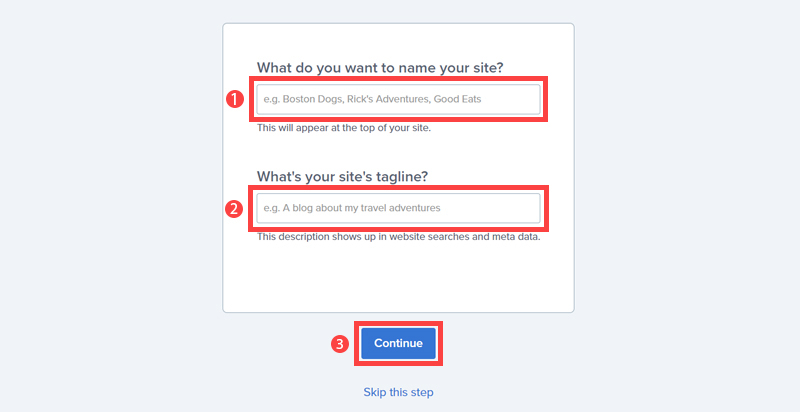
- Now enter the name of your site.
Make sure it includes your business name - in this example 'Preonus' and what you are (i.e. 'Bicycle Store').
This will have important SEO implications later so use this format. Ignore the tag line if you don't have one, it's not that important! Now click 'Continue'.
- Skip this step.
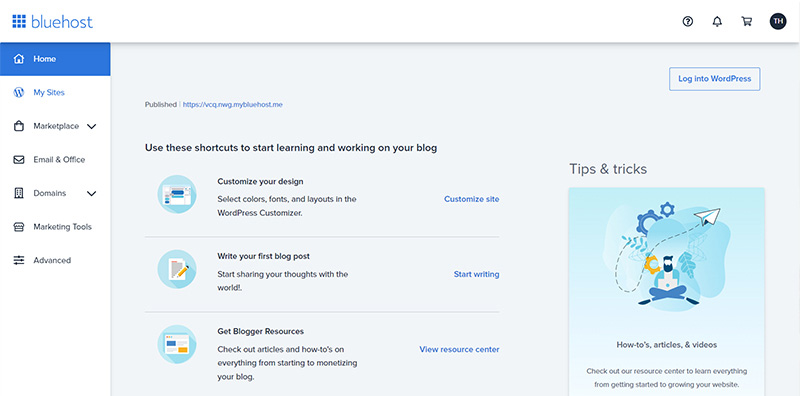
- You will then be forwarded to your BlueHost admin panel.
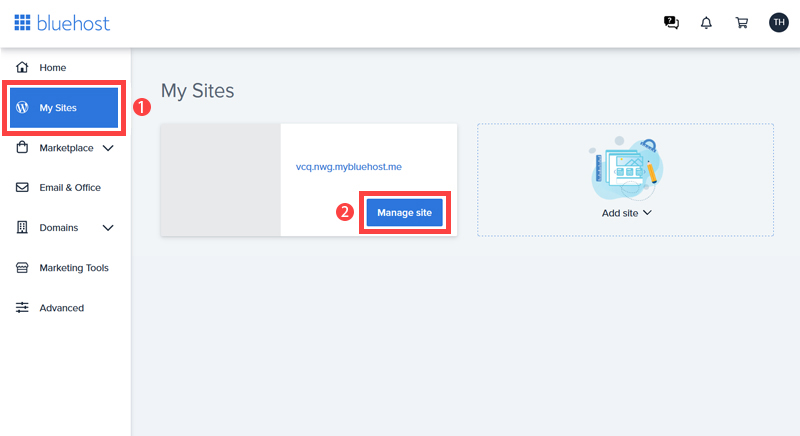
- Click My Sites from the left hand menu and then Manage Site.
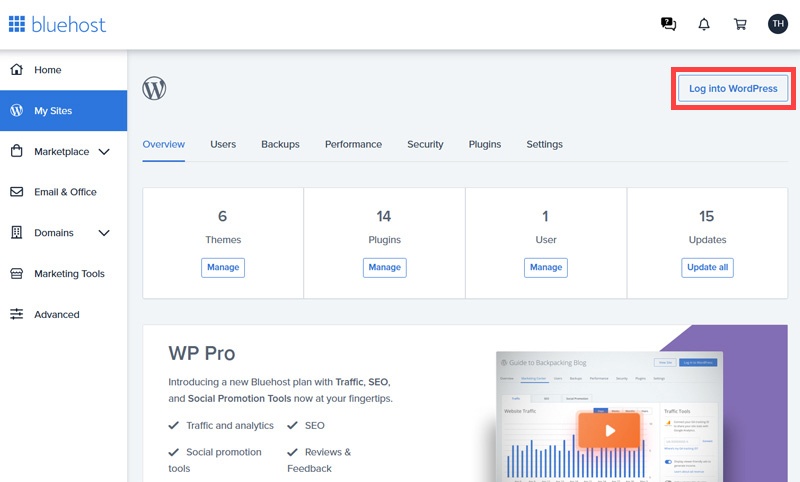
- In the next screen click Log in to WordPress (top right of the screen).
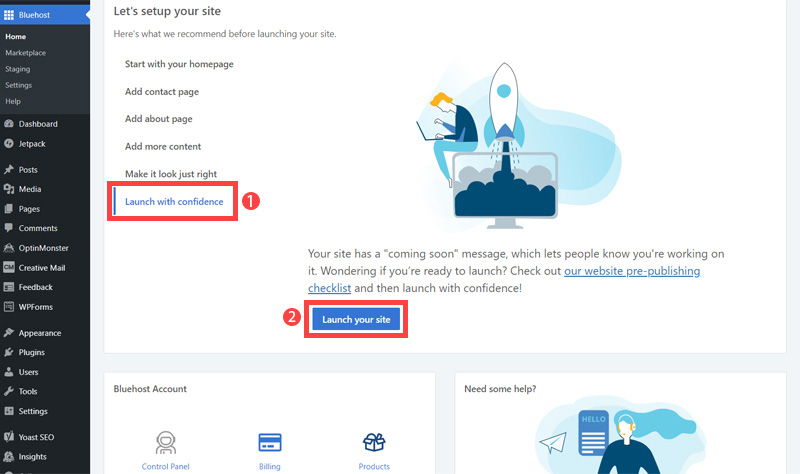
- This will open a new window which is the WordPress admin panel. Scroll down, click 'Launch with confidence'. After that click 'Launch your site' button.
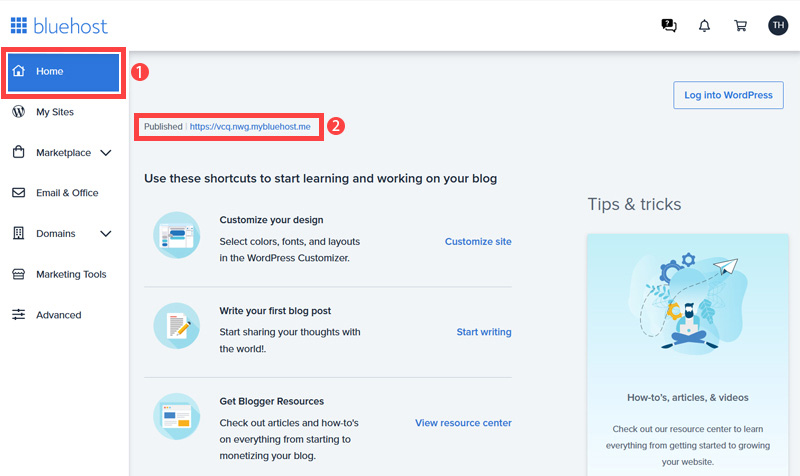
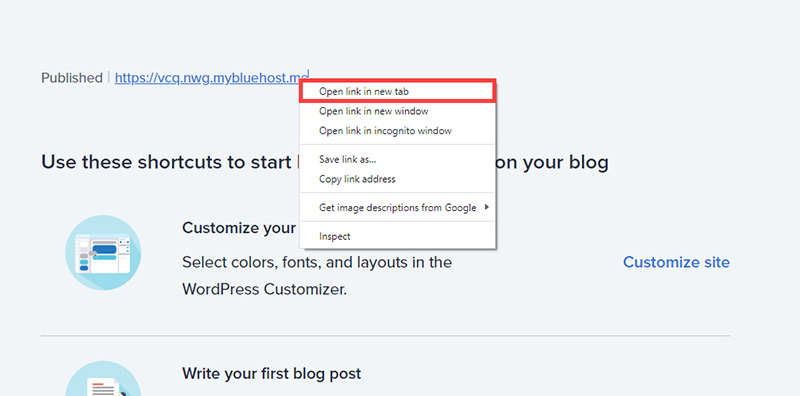
- Back to the Bluehost admin panel. Click Home (1) in the menu and right click of your temporary domain name (2).
- Click 'Open link in the new tab' to open your website and see how it looks.
Now, with your website open you are probably pondering how bloody awful it looks. That's because it will be using the standard WordPress 'theme' which will make you want to cry! A 'theme' is just a fancy way of saying 'a website design'.
You'll need to install a better theme but again you don't need any tech skills to do this.
WordPress off the shelf themes for Bicycle Stores
There are thousands and thousands of WordPress themes out there - its mind numbing and you could easily spend days routing through demos and trying them out. However, I'm going to recommend you use Mesmerize Pro for the following reasons:
- It loads fast - yes, I keep banging on about websites that load fast being important to SEO ... and I really mean it!
- It's easy to use - there is a built-in website page builder that makes it simple to create and edit pages as SquareSpace
- It's nearly ready to go - we can use one of their demo sites which can, with a few tweaks, become a Bicycle Store website.
Mesmerize Pro costs (either a one-off lifetime fee or annual subscription) but I am going to say the same thing as I did for hosting - there are other options out there but unless you know how to speed test them you could end up with a theme that severely slows down your website and shoots your SEO efforts in the foot.
On a side note I am not an affiliate of the company that created and maintains Mesmerize and I get no commission from them. I am recommending this theme purely because of its SEO merits.
OK - let's get Mesmerize Pro up and running.
- Log in to your BlueHost account at https://my.bluehost.com
- Click My Sites from the left hand menu and then Manage Site
- In the next screen click Login to WordPress.
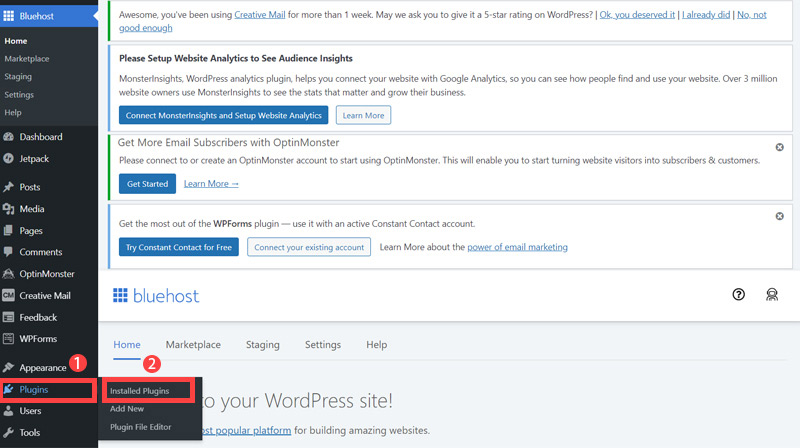
- In the left menu, hover over Plugins and click Installed Plugins.
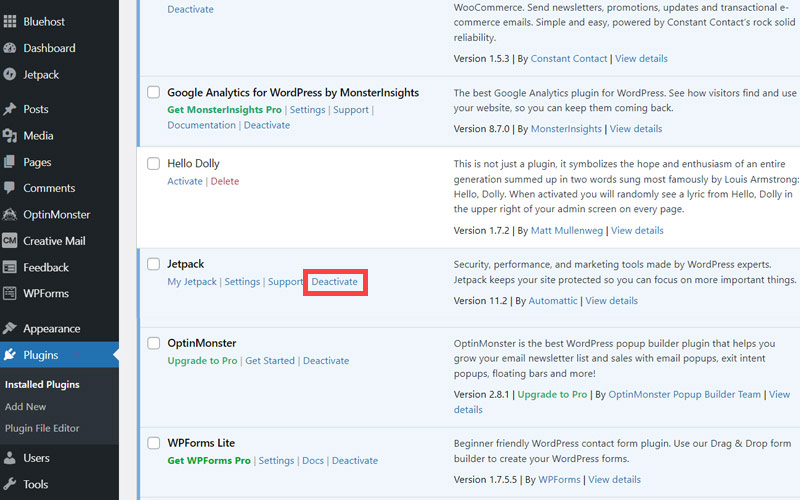
- Scroll down and click on the Deactivate link next to the Jetpack Plugin. We will come back and cover plugins later. For now we just want this particular one out the way.x
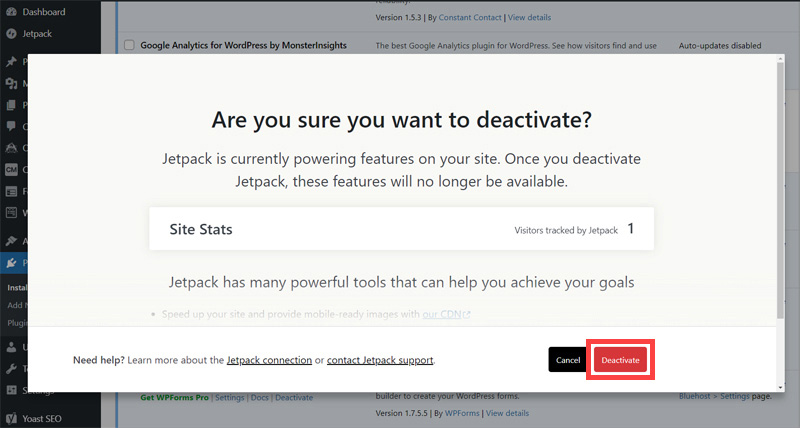
- Click the Deactivate button in the pop-up window that appears.
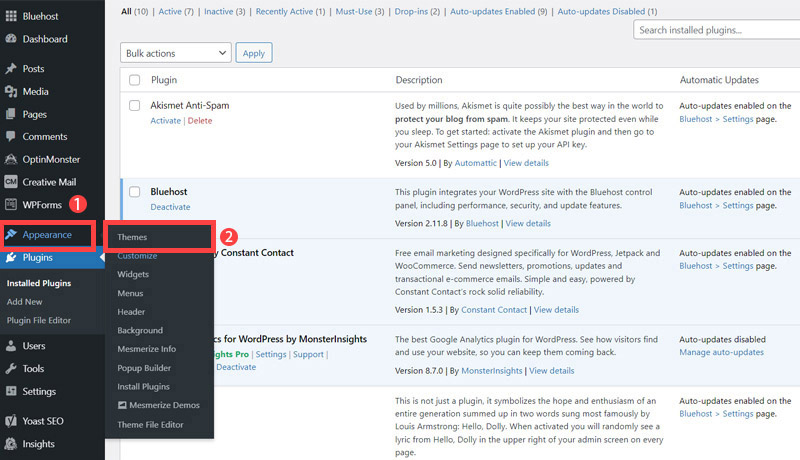
- Now at the bottom of the left hand menu hover over Appearance and then click Themes from the menu that pops out.
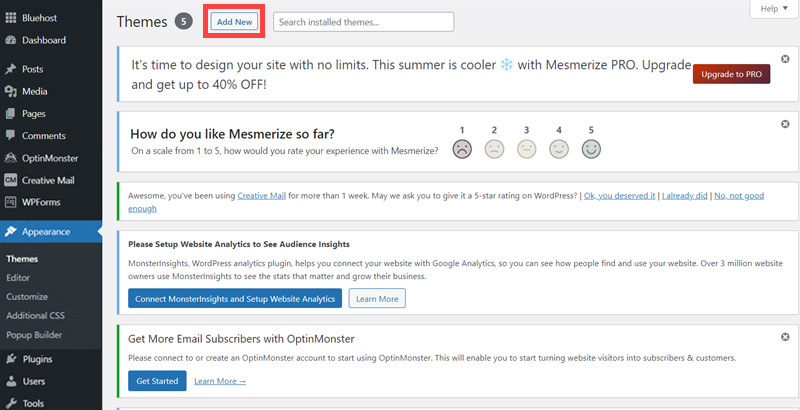
- The next screen will show a handful of themes. Ignore these and click Add New.
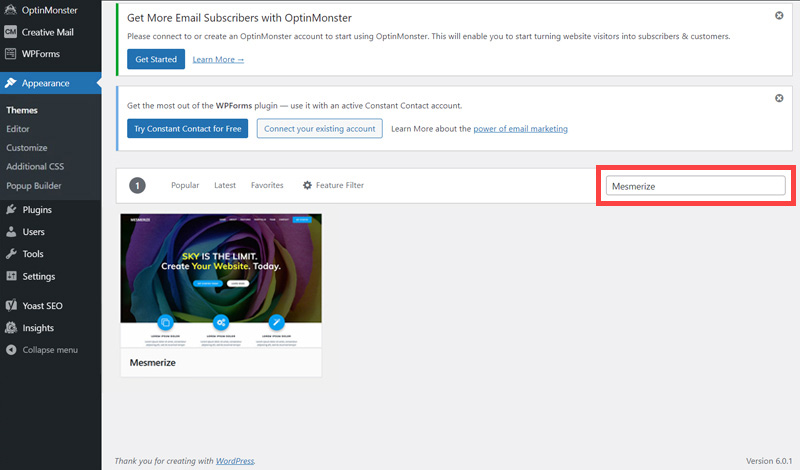
- The screen that opens will show lots and lots of themes. In the search box on the right hand side search for 'MesMerize'
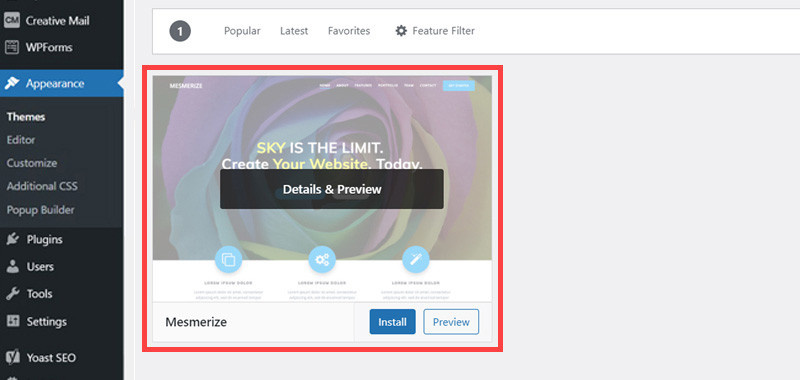
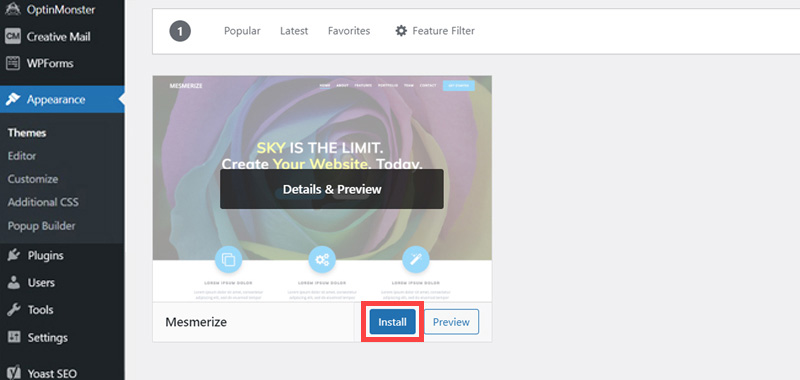
- Hover over the theme to display the hidden buttons.
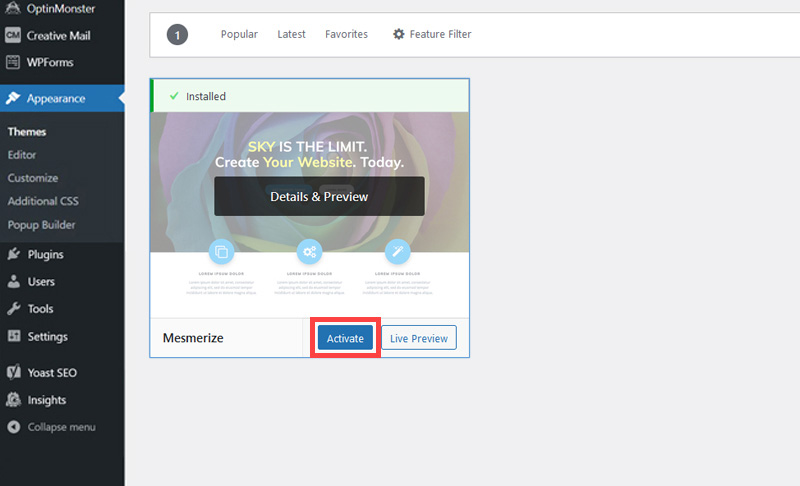
- Click Install and wait here until you see the 'activate' button. This may take a while.
- Click Activate.
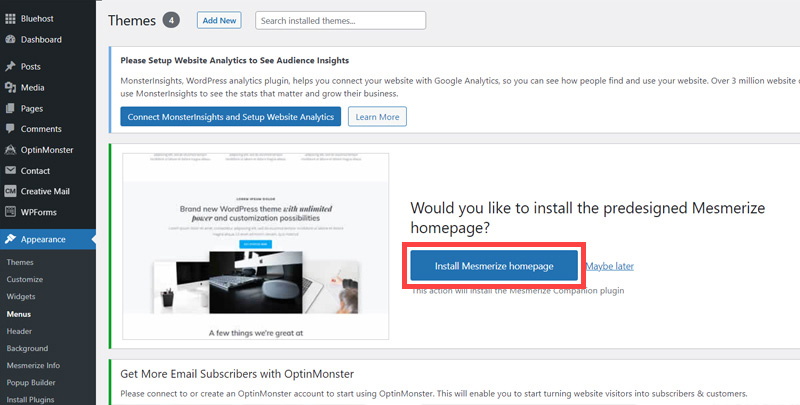
- Click on the Install Mesmerize homepage Button.
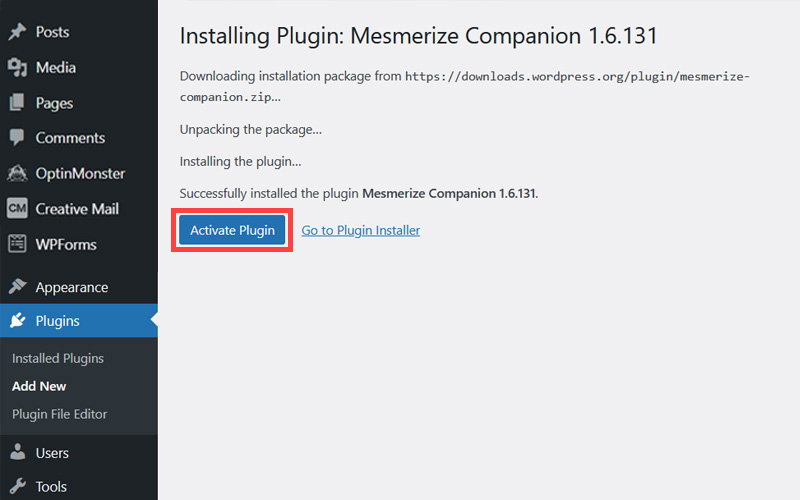
- Then click on Activate.
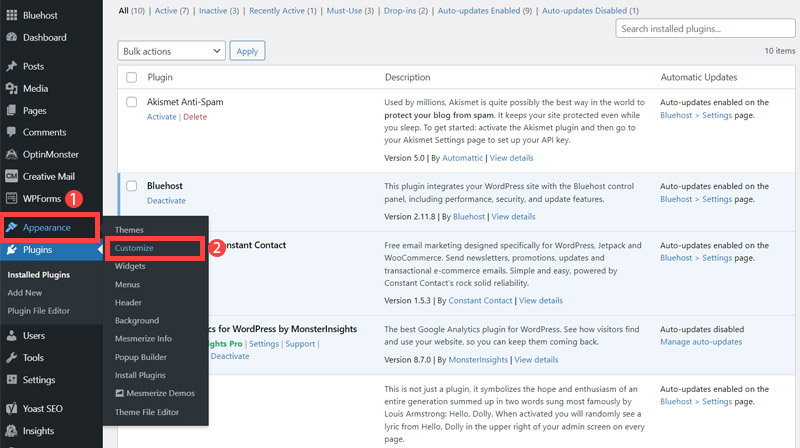
- Back in the left hand menu hover on Appearance again and click Customize.
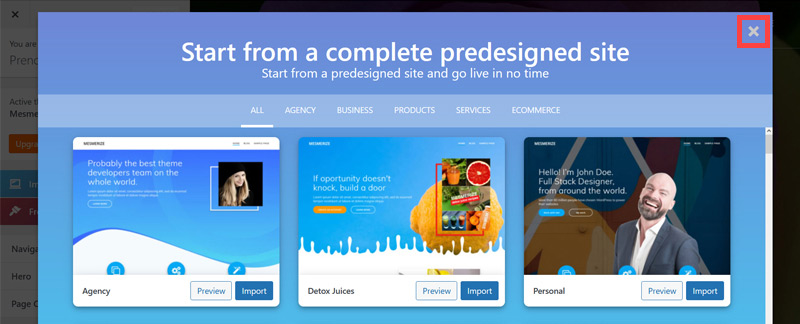
- Here you'll see the free themes on offer. It's a pretty limited choise. We will import a demo and customize the site with the pro versions of Mesmerize. So click the close icon to close this pop up window.
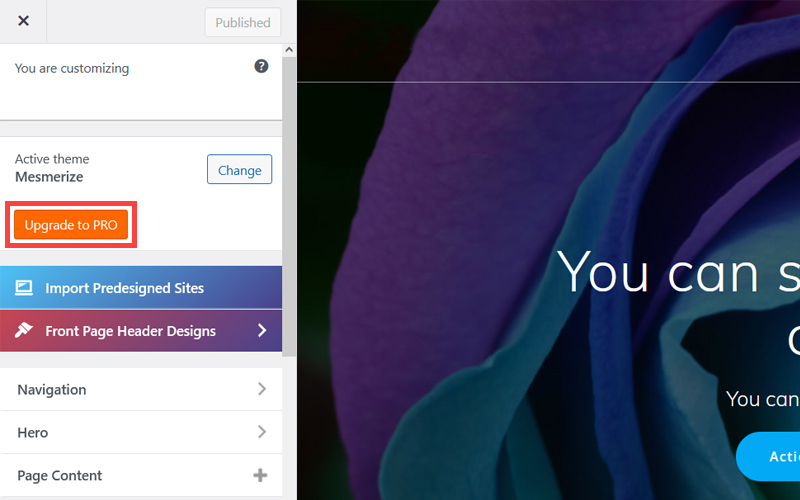
- Click on the Upgrate to PRO button.
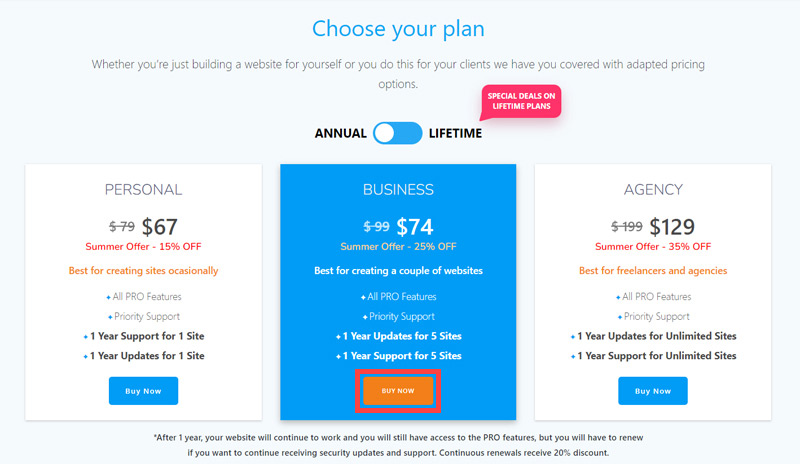
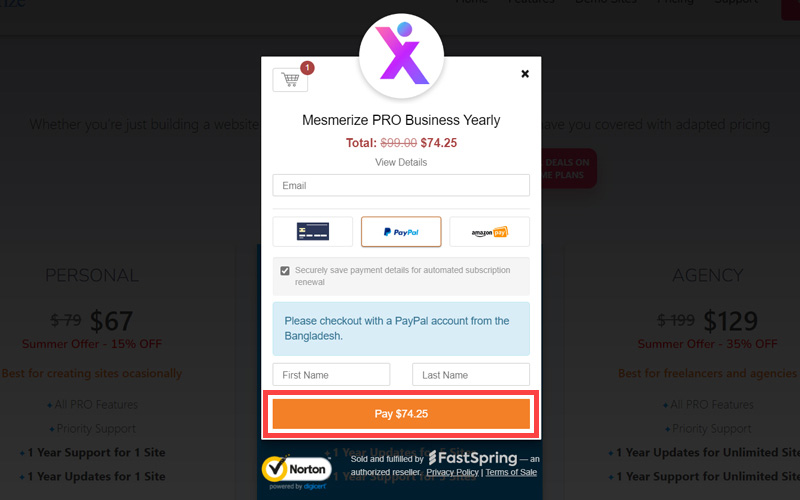
- Choose the Business business plan and click Buy Now.
- Fill in all the details and click Pay.
- After paying you will get a email like this. Click on the Download button. Then, copy and paste the License Key from here into a Word or notepad file. We'll need it later.
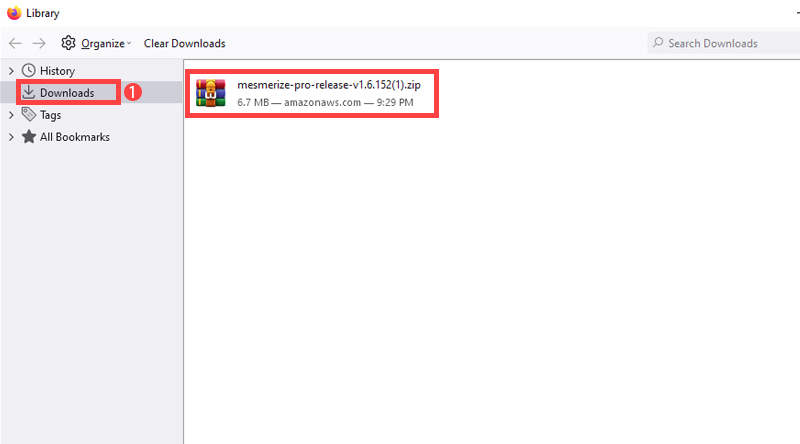
- Download the file into the Downloads folder in your computer. Then go back to the WordPress Dashboard.
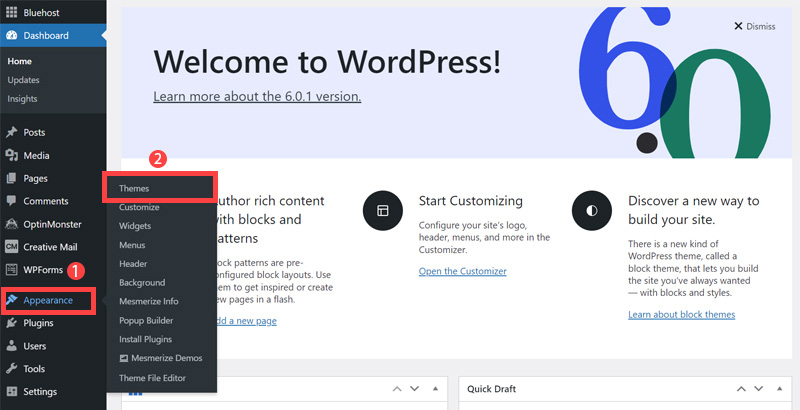
- Now we need to add the pro versions of the Mesmerize theme we just downloaded. To do this go to the left hand menu, hover on Appearance and click Themes.
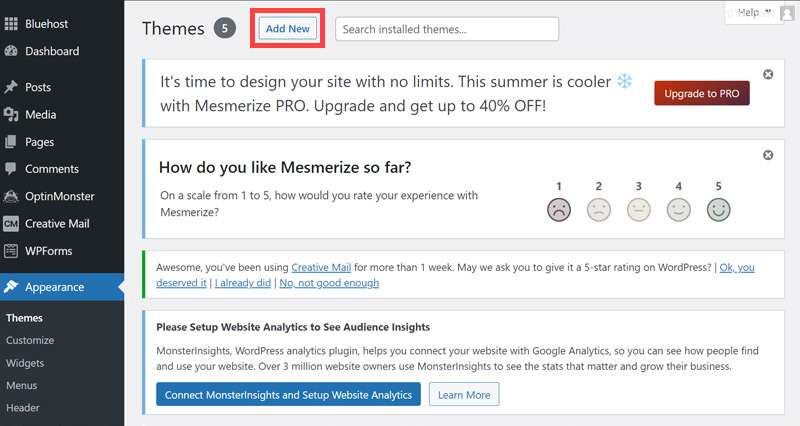
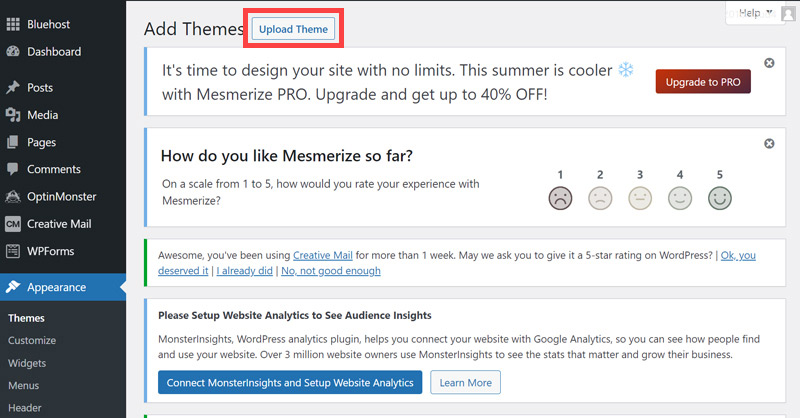
- Click on the Add new button.
- Next, click on the Upload button.
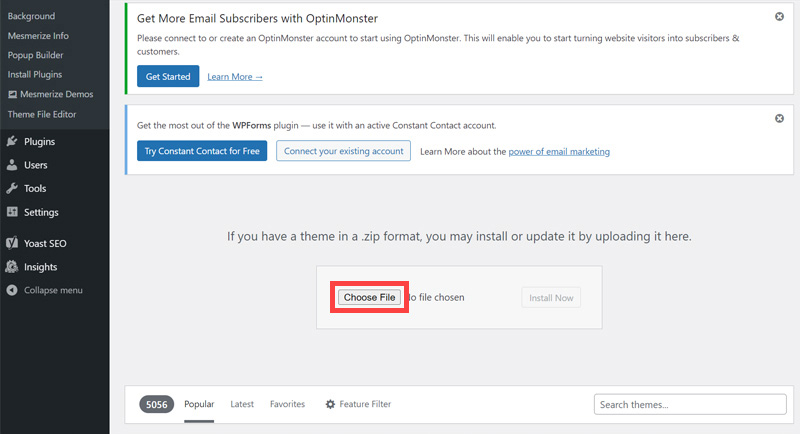
- Then, click Browse
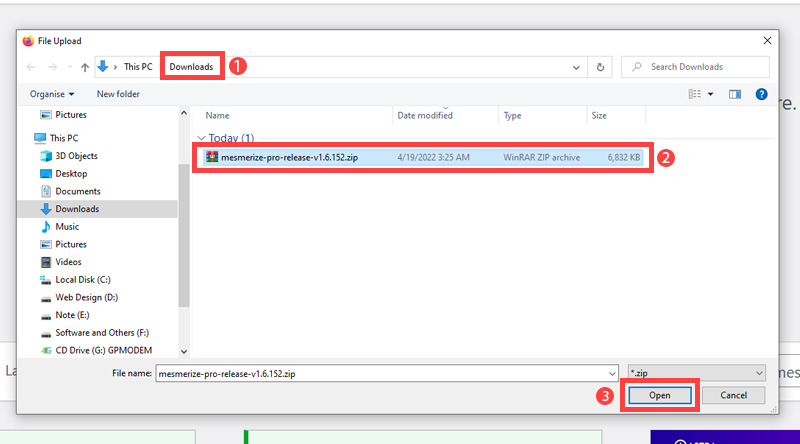
- Navigate to the Downloads folder on your computer then click on the zip file which was downloaded previously. Then click Open.
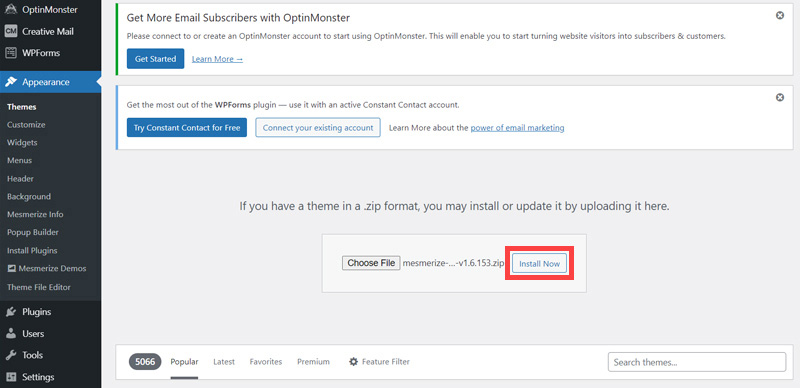
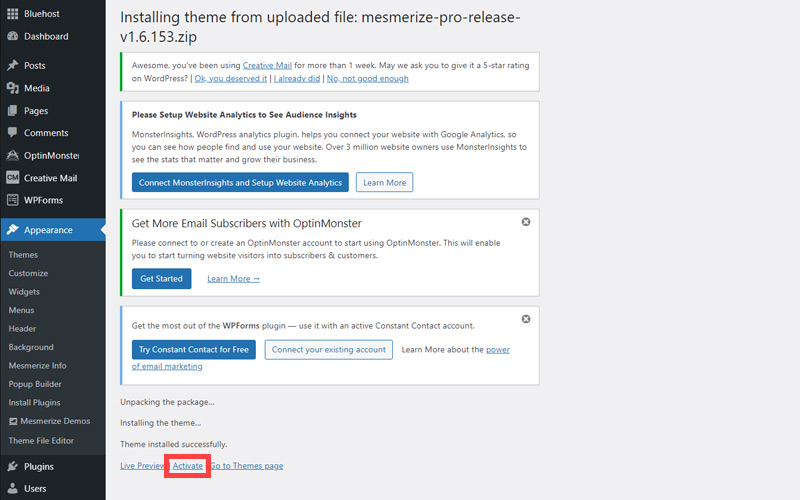
- Click the Install Now button. This may take a while so be patient!
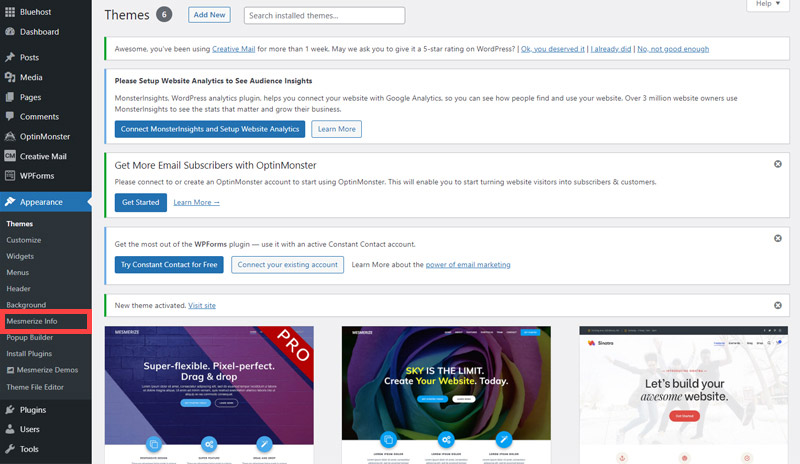
- Click Activate to activate the theme.
- Click on the Mesmerize info from the left side menu to add the Activation Key you copied earlier to a Word or Notepad file.
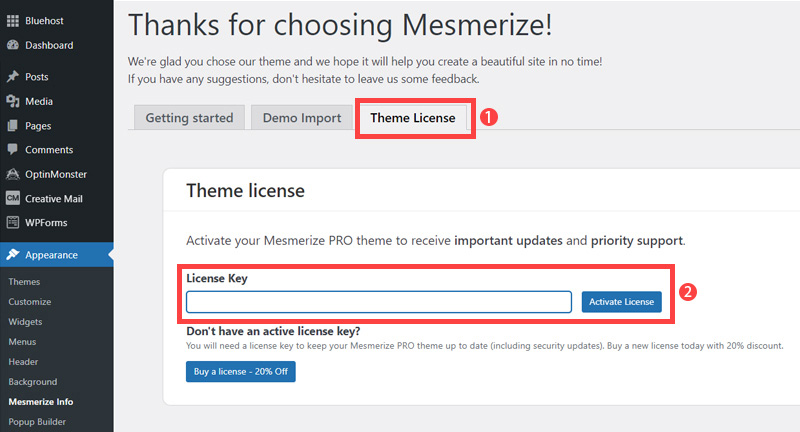
- Click Theme License and put in the activation key from earlier. Then click on Activate License
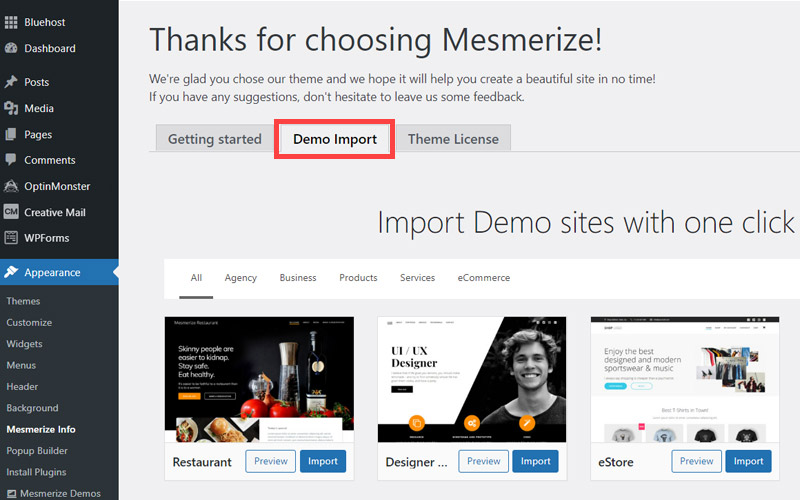
- Click Demo import.
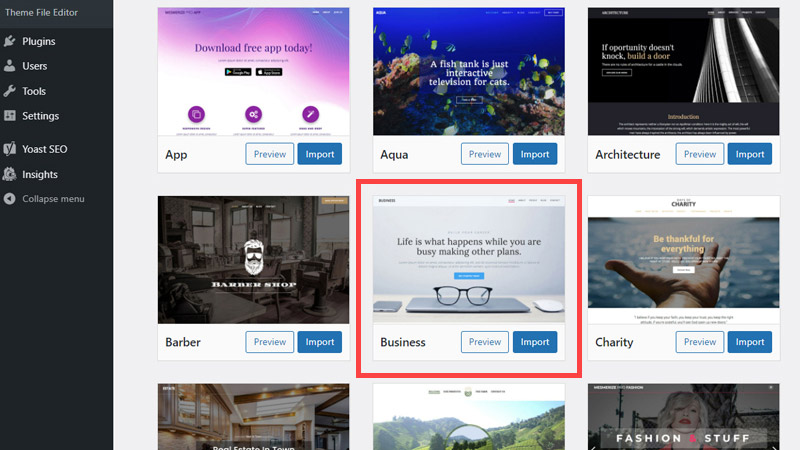
- Find the 'Business' demo and click Import.
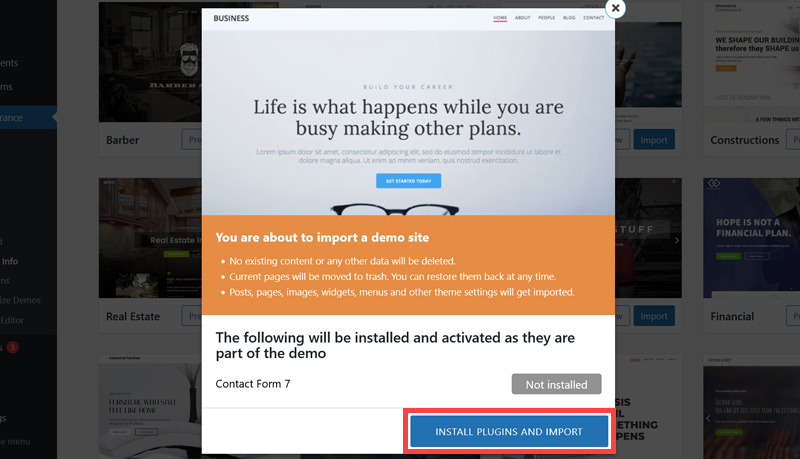
- Click on the INSTALL PLUGINS AND IMPORT button. Then be patient! It may take sometimes to install the demo site.
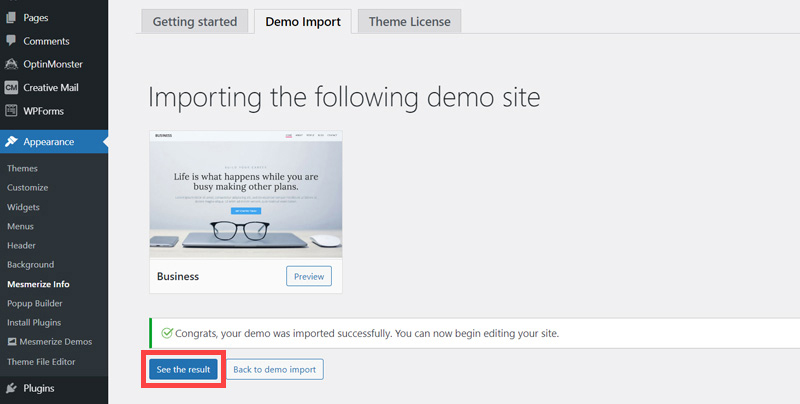
- Click See the result. This will open a new tab in the browser with a website that looks a lot more professional than the WordPress default one that made you wince earlier.
- This is the 'Business' demo site that we will customize in a future tutorial.
In this section:
- The Best Domain Names for Bicycle Store websites
- Top Level Website Requirements for SEO
- Squarespace for Bicycle Store websites
- WordPress and BlueHost for Bicycle Store websites
- Squarespace or WordPress for your Bicycle Store Website
- SquareSpace Set Up Basics for Bicycle Stores
- WordPress Set Up Basics for Bicycle Stores
- SEO Friendly Website Structuring for Bicycle Stores
- Creating an SEO Friendly Structure for a Bicycle Store website in SquareSpace
- Creating an SEO Friendly Structure for a Bicycle Store website in WordPress
- Choosing images for your Bicycle Store website
- Stock photos for Bicycle Stores websites
- Optimizing images before loading to your website
- Adding images to your Bicycle Store website
